
In order to assist the user in paying their employees by credit transfer, a dedicated Credit Transfer Payments Report is available in BrightPay.
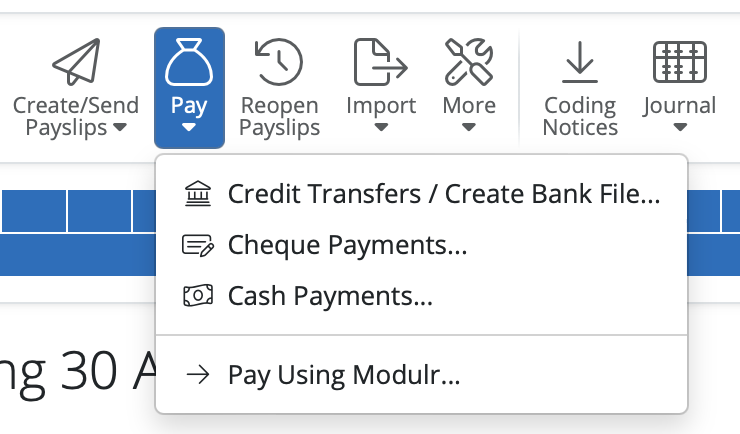
1) After finalising your payroll period in Payroll, simply select 'Pay > Credit Transfers / Create Bank File...' on the menu toolbar.
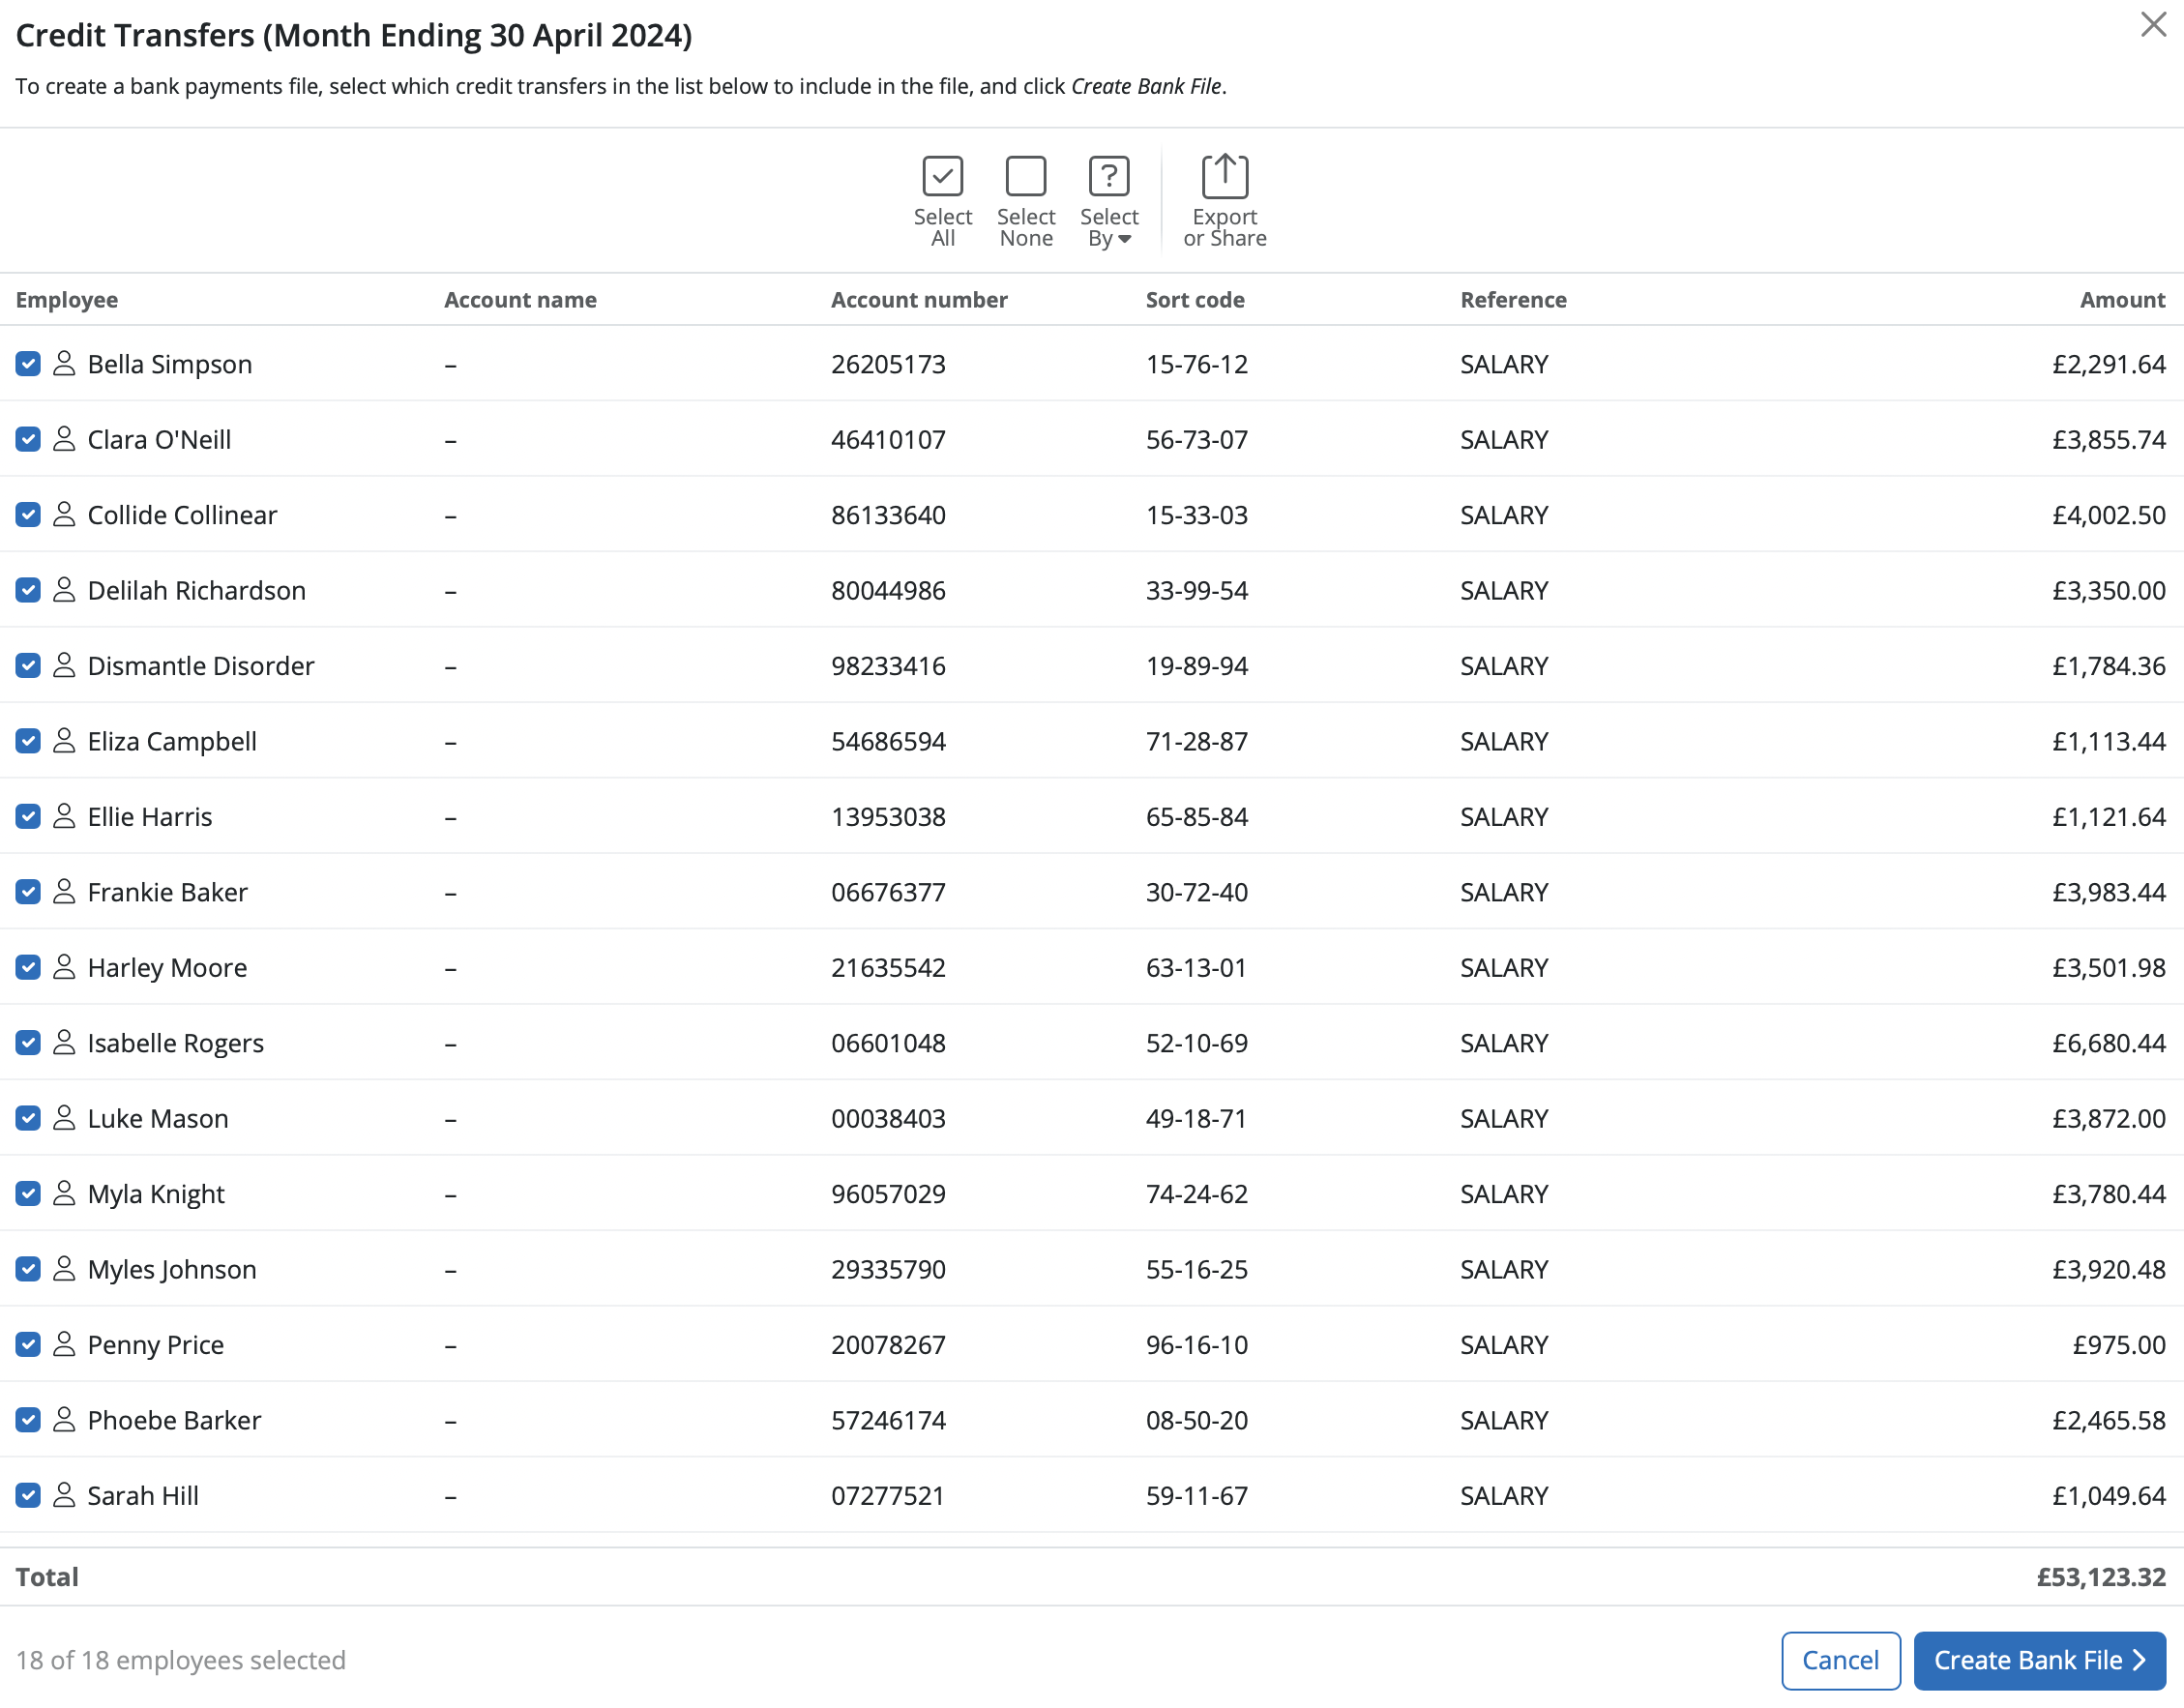
All employees whose payment method is set to 'credit transfer' will be displayed on the screen and the report will show the breakdown of the credit transfer payments to these employees.
Note - There are 3 options you can click to export the report to PDF.
You can choose to download and save the file, or you can click Print to print the report.
2) To subsequently print/email/export the Credit Transfer Payments Report, simply click the Export/Share option on the menu toolbar.
Note to the above:
Employees who are set to be paid by credit transfer and who have left in the period being paid will be de-selected by default.
Where such employees have already received their final payments earlier in the pay period, this helps to avoid inadvertently paying them again.
Paying Employees using a Bank Payment File
For employees paid by credit transfer, a Bank Payment File can be created to upload through your banking software:
Please note: to be able to use this option, employer bank details must first be entered within your Employer utility and you must have approval from your bank to submit bank payment files to them.
Information on adding employer bank details can be found here
1) Select the Credit Transfers tab heading.
2) Select the employees you wish to include in the bank payment file on the left hand side.
3) To create the Bank Payments File, click Create Bank File on the bottom right of the window.

4) Select the Bank Account you wish to pay from and select the appropriate bank File Format.
Please note: If the format you require does not show on the list available you can add your own custom bank file template to BrightPay. For more information select here.
5) Click Download to save the bank file to your Downloads folder on your computer. The bank payment file is now created and can be uploaded through your bank facility when ready.
You can add the BACS Service User Number (SUN) when generating the bank file on certain types of bank file templates. Ensure you choose the correct bank file template for the Service user number field to appear:
Note: If you are paying employees earlier than the usual pay date set up on your payment schedule, ie for Christmas or a bank holiday and need to create a bank file with a different pay date - you can finalise the payslips with the date you are paying the employees, by setting a batch pay date that matches when the money will be received by your employees.
When finalising the payslips, choose 'Batch Set Pay Date' at the top of the screen. Then enter the date you are paying the employees and this will be the date created on the bank file.
Generating a CSV Bank File Template
BrightPay automatically defaults to a '.txt' file format for bank file creation.
To create a bank file in a csv file format; In the File name field, replace 'txt' with 'csv'
So it will appear like this when generating the bank file, with '.csv' at the end of the file name:
As you should always report to HMRC the usual pay date (even if paying early), you will not want to send the FPS created when generating the bank file with the earlier pay date.
Once you have created the bank file with the earlier pay date, re-open the payslips and finalise again - this time without changing the pay date. The FPS will be created with the usual scheduled pay date and can be sent to HMRC.
Please note: only 1 FPS per pay period should be submitted to HMRC to avoid duplicate declarations of employees' earnings and PAYE account liability issues.
When creating a bank file, leavers in the selected period are automatically unticked. To include them, you must manually select them. BrightPay will display a warning if leavers are present, prompting you to include them if needed.
If no bank account details are in the leaver's record and the option is greyed out, you would need to re-open the final payslip for that employee > enter the bank account details in the 'Payment' section for the employee and finalise the payslip again before generating the bank file.
Note: Bank files can only be generated from within the BrightPay Payroll utility and cannot be created in the Client Portal. To share sensitive information securely such as bank files, you can use the Resources section and ensure the access rules are set to 'No Access" - this will ensure that whilst the client can view this resource, no employee will be able to.
If a payment has been sent to an employee's old bank account, you would need to contact the receiving bank to raise the issue with them and request a refund. BrightPay will generate the bank file details based on the information entered into the employee's record. If a change of bank details is communicated by the employee, ensure the software is updated as soon as possible to stop any payments to incorrect recipients from occurring.
You cannot generate a SEPA bank file in BrightPay UK. SEPA is for payments in Euros and BrightPay UK only allows £ GBP processing / payments.
BrightPay will be fully compliant with the new ISO20022 payment file standard ahead of the November 2026 deadline. Customers do not need to take any action - the update will be applied automatically and your bank files will continue to work as normal.
Comments
0 comments
Article is closed for comments.