
A generic CSV journal option is available in BrightPay for users to create nominal ledger mapping of their choosing.
This may facilitate users who use accounting software which BrightPay doesn't specifically cater for, or users who wish to create their own mapping for Exact, Kashflow, Quickbooks, Sage or Xero instead of using the already built-in mappings.
1) Within Payroll, select Journal on the menu toolbar, followed by New Other Journal.
2a) On the next screen, leave as 'Other' or select which Accounting Software your journal is to be created for.
b) Set your Date Range - the journal will include records for all payslips (across all pay frequencies) with a pay date within the selected range.
c) How should the journal records be organised? - select whether you would like the journal to include individual records for each employee or whether to merge the records for each unique date.
d) Click Continue
3a) Nominal Ledger Mapping - for each of the payroll data items listed, enter the nominal account code to which amounts will be mapped to in your journal. A nominal account code can be used for multiple items. A description can also be entered for each data item.
b) When ready to proceed, click 'Continue'.
4) Nominal Ledger Mapping - Variations - this screen allows you to specify any circumstances for which amounts should be mapped to an alternate nominal account code (e.g. depending on pay schedule, directorship, departments, specific rates/additions/deductions, etc.)
a) For each payroll data item you wish to add a variation for, click Add Variation:
b) For the payroll data item selected, set the rules to apply in order for the amount to be mapped to the designated nominal account you enter on this screen.
Rules can be set according to pay schedule, directorship, department and specific pay items.
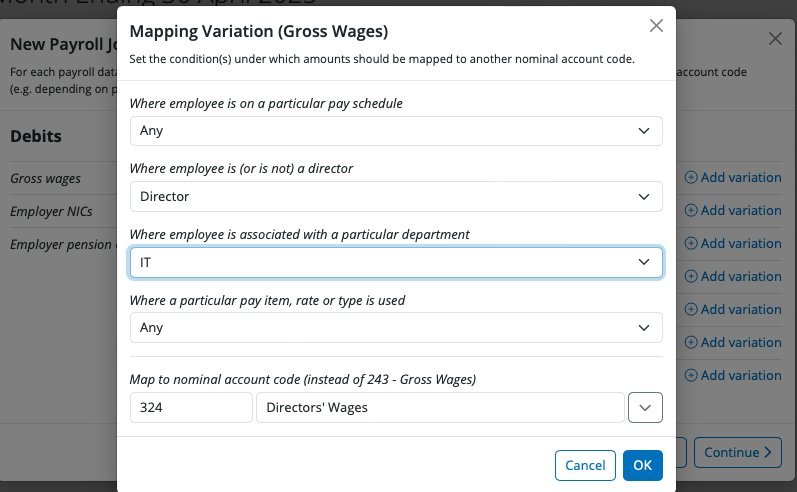
c) Click OK when complete.
Your rule will now be displayed on screen under the payroll data item it is associated with.
d) Further variations can be added for different pay items or for the same payroll data item by simply clicking Add Variation again and setting the rules to apply.
e) Once variations have been set, these can be edited, deleted or re-ordered by clicking the spanner symbol next to it. In addition, clicking the nominal account information displayed in green provides quick access to the rules that have been set for it.
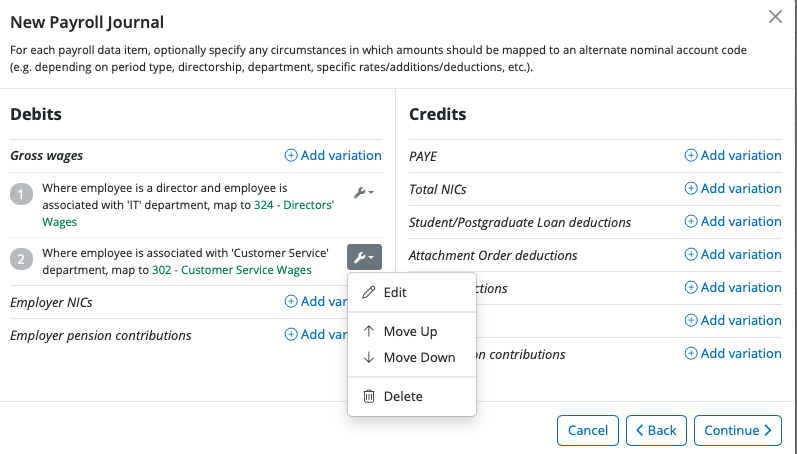
f) On completion of this screen (where required), click 'Continue'.
5) Nominal Ledger Mapping - Custom Items - this screen allows you to add further adjustments to your payroll journal before posting.
This is an optional screen which can be used to record HMRC Payment adjustments such as employment allowance, recoverable statutory pay, etc. for example.
Guidance on completing this screen can be viewed under the 'Nominal Ledger Mapping - Custom Items (e.g employment allowance)' article.
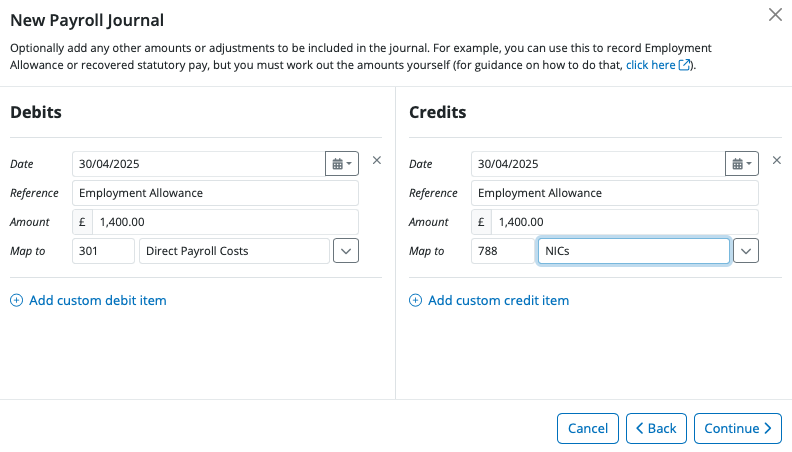
On completion of this screen (where required), click 'Continue'.
Your journal will now be displayed on screen for review. Simply click the 'Back' button to make any amendments.
6a) When ready to export the journal to CSV, click the 'Download CSV File'
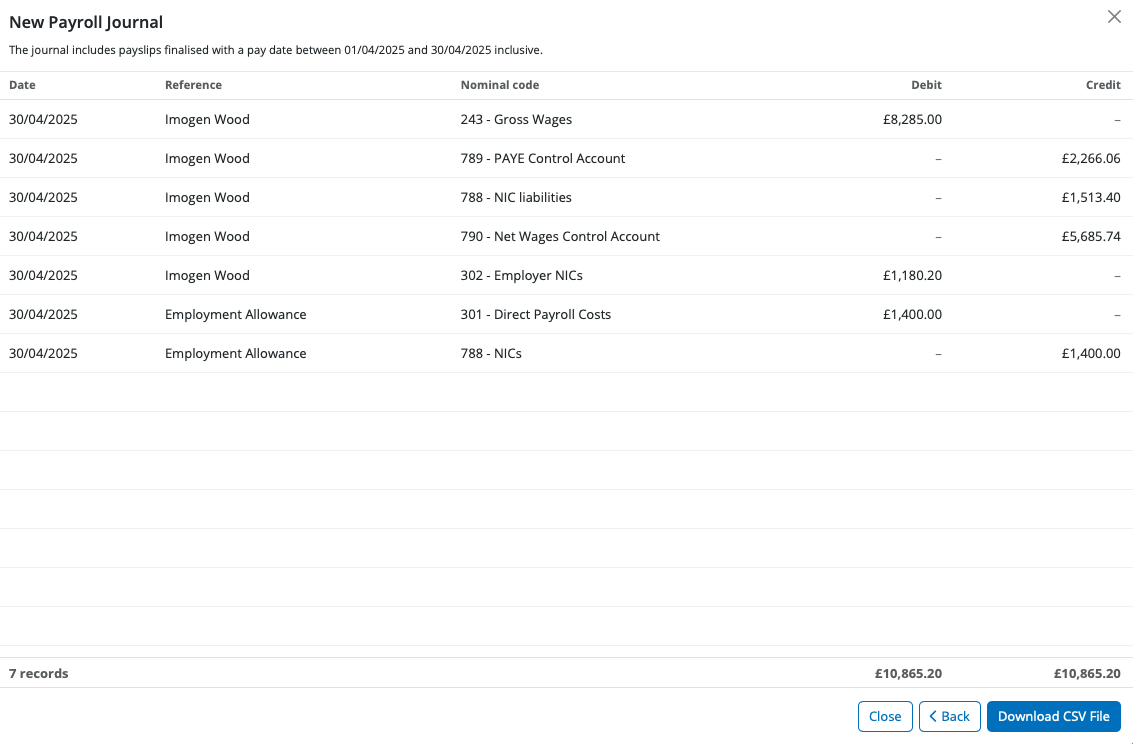
b) The file will be downloaded to your Downloads folder on your computer.
c) To close the journal screen, simply click the cross at the top right of this screen. If you have made any changes to the journal, you will be asked if you wish to save your changes. Click 'Yes' or 'No' as required.
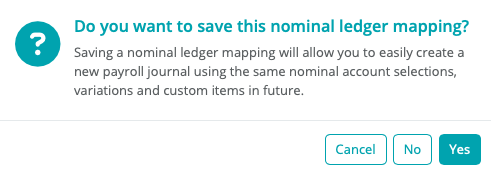
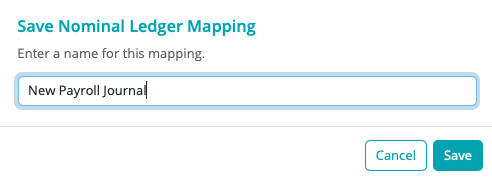
d) If you choose to save your journal you can enter a Mapping name of your choice. This name will subsequently appear in your listing of journal options and the saved journal will now be added to your journal listing for future use
Your payroll journal is now ready for upload into your accounting software.
Note: If you cannot connect to your API accounting provider when posting a journal in BrightPay, the recommended solution is to disconnect and then reconnect the integration:
- Go to the journal posting screen in BrightPay.
- Choose the option to disconnect (or "reset authentication") - by clicking on the spanner icon on either the first or second journal screen.
- Reconnect by logging in with your credentials when prompted.
- Retry posting the journal.
This process refreshes the connection / authentication and usually resolves connection issues.
The wording of the payroll journal description in BrightPay cannot be changed or customised. It will always use the default description provided by the software, such as 'Sent from BrightPay.' If this feature becomes available in the future, it will be announced in the release notes.
Comments
0 comments
Article is closed for comments.