
Payslips can be customised before they are printed, emailed or downloaded.
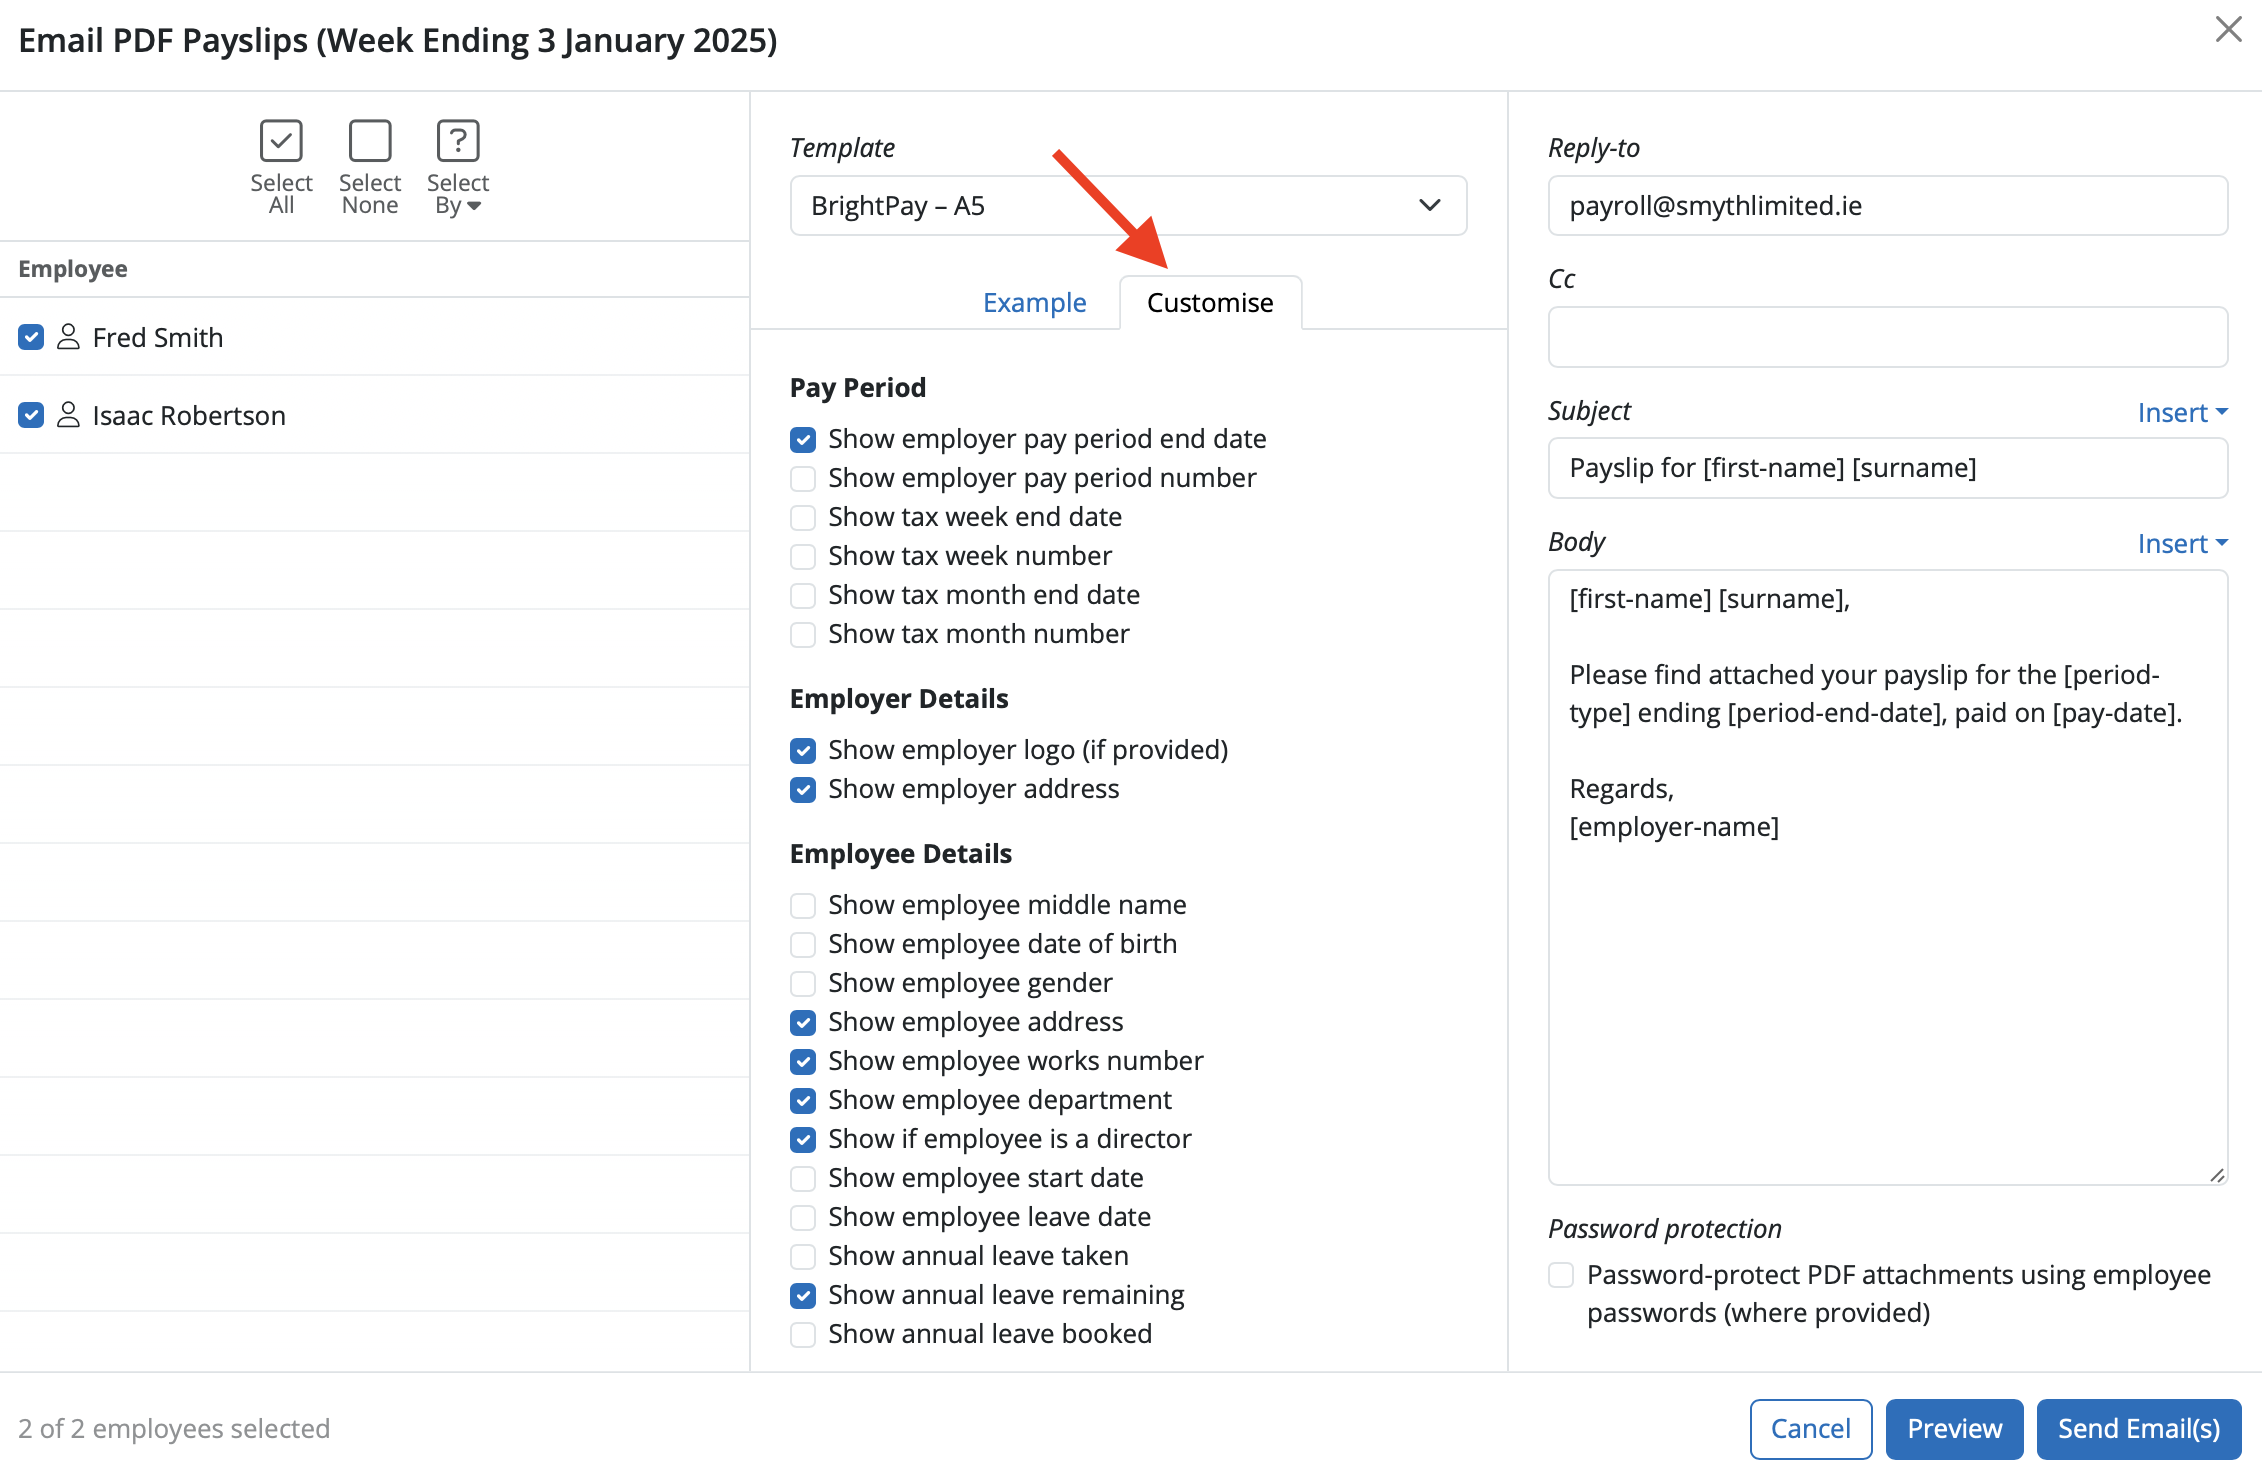
Within Create/Send Payslips > Email or Download PDF Payslip for Multiple Employees, click the ‘Customise’ tab in the middle. This facility allows you to add or remove certain information on the payslip as per user requirements (e.g. add a company logo, show employee's department, notes, annual leave information etc; remove payment method, BrightPay logo etc.)
To add a logo to the employer, go to Employer utility > Edit Employer Details > Basic Information section and upload a logo by clicking on 'select a logo image'.
(Select a high quality and evenly-margined logo image in PNG format with a solid colour or transparent background. Large files will be automatically downsized)
The company (employer) name shown on payslips is the one entered in the Employer basic details section. There is no option to show any other name other than the actual registered company name. The trading name field is not able to show on the payslips.
If you wish to display the annual leave remaining on an employee's payslip, select this option under the Employee Details section. Note that the leave shown on the payslip will be leave remaining as at the period end date. To view annual leave on a payslip, the payslip must first be finalised or the annual leave will not show.
To show payrolled benefits on the payslip, select the option under the 'Amounts' section in customise payslips > enable 'Show notional pay' and 'Show benefit descriptions'.
Whilst you can customise the payslips with the options available in 'customise' section, there are certain elements that will always show on a payslip - for example employee deductions. These cannot be customised or removed. If an employee's pay has been subject to any deduction such as tax, NI, SLD, pension contributions - these must show on the payslip.
Please note: The 'Example' payslip on the Email / Download PDF payslip preview is just an example employee for display purposes only. Click the 'Preview' option to view the actual employees' payslips for this Employer.
If the settings are not staying and defaulting back to previous settings, try to clear the caches/cookies on the browser.
If an employee is in multiple departments, only the primary department will show on the payslip.
The positioning of all fields displayed on the payslips are pre-programmed in BrightPay. There is no option to move these around (ie change the location of the logo or employer name).
There is no way to create address labels on BrightPay Cloud.
If the period end date or pay period number shown on an employee’s payslip is different from the period end date you set on the payment schedule in BrightPay, check your payslip display settings.
Go to the Customise section when creating or sending payslips. If 'Show employer pay period number' is selected, the payslip will display the HMRC tax week (for example, period 3), based on which HMRC tax week the employer period end date.
To show your actual period end date (e.g., 19th April 2026), select 'Show employer period end date' instead. This will update what is displayed on the payslip to match your payment schedule. Adjust this setting as required to ensure payslips display the correct period information for your payroll.
To display nominal (notional) pay values on payslips in BrightPay, go to Create/Send Payslips > Download Payslip PDF for Multiple Employees > Customise. Under the Amounts section, select 'Show notional pay'. This will include the notional pay values on the payslip.
Employee YTD information is automatically shown on the payslip in the Year to Date section, to include employer YTD items such as employer NIC or employer pension - choose the required employer YTD fields under 'Amounts' within Customise payslips.
Whilst the Employer name will appear on the payslip, the 'Trading as' name is not a customise option.
To show employer pension contributions in the 'This Period' section of a payslip in BrightPay Cloud, go to Create/Send Payslips and select Download PDF Payslips for Multiple Employees. Click on the 'Customise' field and under the Amounts section, tick the box for Employer Pension. This will then display the employer pension contribution in the 'This Period' section of the payslip.
Note: There is no option to show an employee's 'preferred' name on payslips. Payslips will show their legal name as per the name entered into BrightPay and this cannot be customised / changed. HMRC require an employee's legal name for FPS submissions and this will be the name displayed on payslips.
FAQs
A. You will need to select the option to hide zero payslips.
Go to the Payroll section.
Click Create / Send Payslips.
Choose Download Payslip PDF for Multiple Employees… and click Customise.
Tick the option “Exclude payslips with zero take-home pay”.
Comments
0 comments
Article is closed for comments.