
Here is a video tutorial on how to set up your Payment Schedule in BrightPay - Setting up your Payment Schedule
BrightPay allows Weekly, Fortnightly, 4-Weekly, Monthly, Quarterly and Yearly payroll to be run simultaneously, if required. BrightPay will allow multiple schedules for each individual pay frequency such as 3 monthly schedules, 4 weekly schedules, etc.
How to create your Payment Schedule
You can create a payment schedule under > Payroll > Schedules > Create New Weekly/Monthly/Fortnightly/4-weekly/Quarterly/Yearly Schedule.
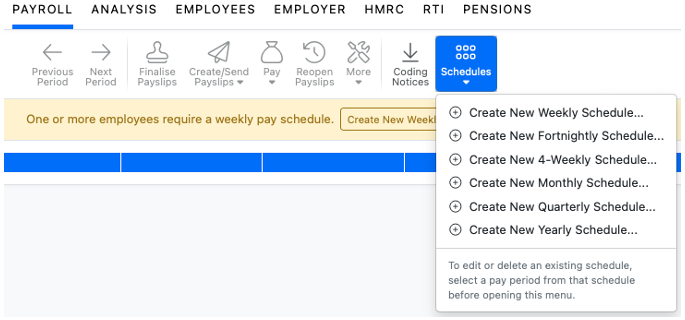
After allocating a pay frequency to an employee within their employee record, BrightPay will recognise the pay frequencies that are required for the employer.
Before payroll can be processed within the Payroll utility, you must first set up the payroll schedules you require.
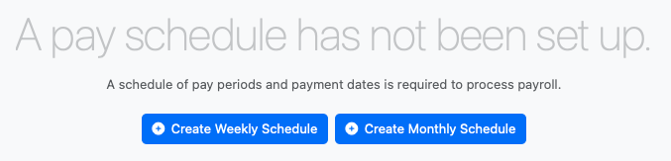
**NB: once a schedule has been set, this cannot be changed without re-defining (clearing down) your payroll data processed to date. If you decide to proceed, please be aware that resubmitting the payroll afterwards may result in duplicate liabilities being reported to HMRC. It would be advisable to seek advice specific to your situation to ensure you take the correct course of action
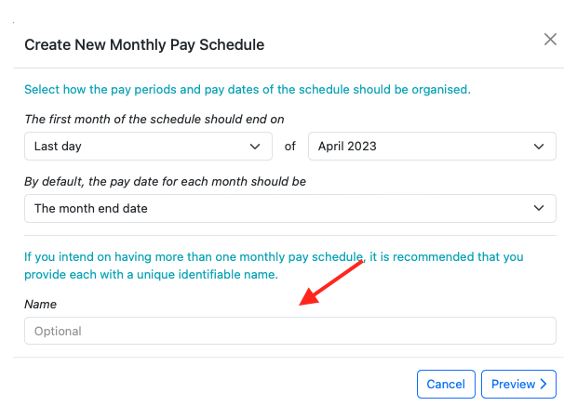
a) First, select the date when your first period of the schedule is to end on, followed by how your pay date is to operate.
b) You can name your pay schedule if you intend to have more than one schedule for this payment frequency.
c) To preview your schedule of periods, simply click ‘Preview’. This is always recommended for you to check that you have the correct number of pay periods you require for the year.
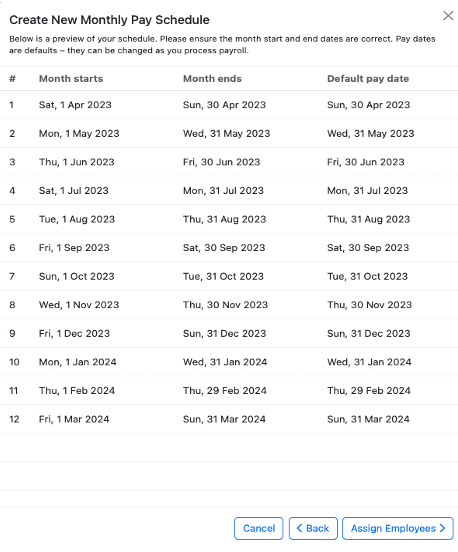
d) Click ‘Assign Employees’ when ready to assign employees to this new pay schedule.
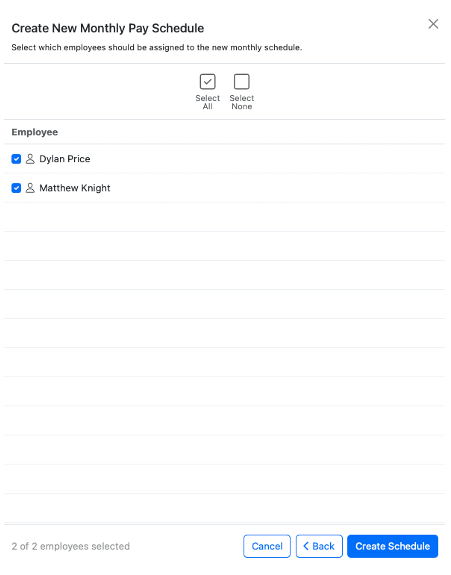
e) Select the employees you wish to include in this pay schedule and select ‘Create Schedule’.
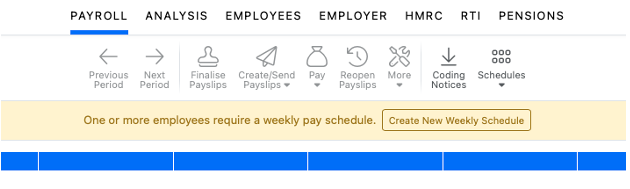
As employees are added to the payroll during the tax year, BrightPay will identify if a new payroll schedule is required and will prompt the user to set the schedule they require for the new pay frequency:
Note: Once a schedule has been set up, it is not possible to view pay period start dates or pay dates. To view period end dates, hover over the period with your mouse and the period end date will be displayed.
In BrightPay, the options to set the monthly period end date and pay date as the 29th, 30th, or 31st are not available in the schedule setup because not all months contain those dates (such as February). The system only allows selection of dates that are guaranteed to occur every month.
If you wish employees to be paid on the last working day of each period, select the 'Last Working Day' option, or manually process payroll each month for the appropriate date by using the Batch set pay date facility whilst finalising payslips.
BrightPay only allows one payment per pay period for each employee. There is no option to split a pay period or process multiple payments for the same employee within the same pay period.
Only edit a schedule to amend the pay date if you want to permanently change the pay date going forward. For a one off change of pay date, ie if the date falls on a weekend, bank holiday or paying early for Christmas - use the 'batch set pay date' feature on the finalise payslips screen.
FAQs
Q. Why does my first pay schedule in the new tax year start in period 2 instead of period 1?
A. When a new pay schedule skips to period 2 at the start of the tax year, it is because the pay date selected during setup falls within HMRC’s period 2. The first available pay period will always be determined by the pay date you set up. If this schedule is incorrect and no payroll has been processed yet, you can delete the schedule and set it up again with the correct pay date.
Note: Deleting a schedule is permanent and cannot be undone, so please double-check before you proceed.
Q. Why can't I select the 29th as my pay date in BrightPay?
A. BrightPay doesn't allow the 29th, 30th, or 31st as fixed pay dates because not all months have these dates (February only has 28/29 days). The system only lets you select dates that occur every month. If you want to pay on the 29th, you have two options:
1. Use 'Last Working Day' - Select this instead for the last working day of each period or
2. Manually set the date each month - Use the Batch set pay date facility when finalising payslips. This gives you flexibility while keeping payroll consistent.
BrightPay cannot accommodate pay schedules that alternate between 4 and 5 week periods. When setting up a pay schedule, you will need to choose a fixed period end date — either a specific date of the month, a set weekday, or a 4-weekly schedule. Whichever option you select will remain consistent going forward and cannot be adjusted to accommodate months where 5 weeks of pay may fall within a single period.
Comments
0 comments
Article is closed for comments.