
*Please note: this particular functionality must be activated by the employer to be available to the employee. For further information on how to configure employee self service settings, please click here .
If an employee requests annual leave or a change to personal details via their Employee Self-Service Portal, you will be able to view leave or change of personal details requests on your Client Portal.
1) Log into The Client Portal here.
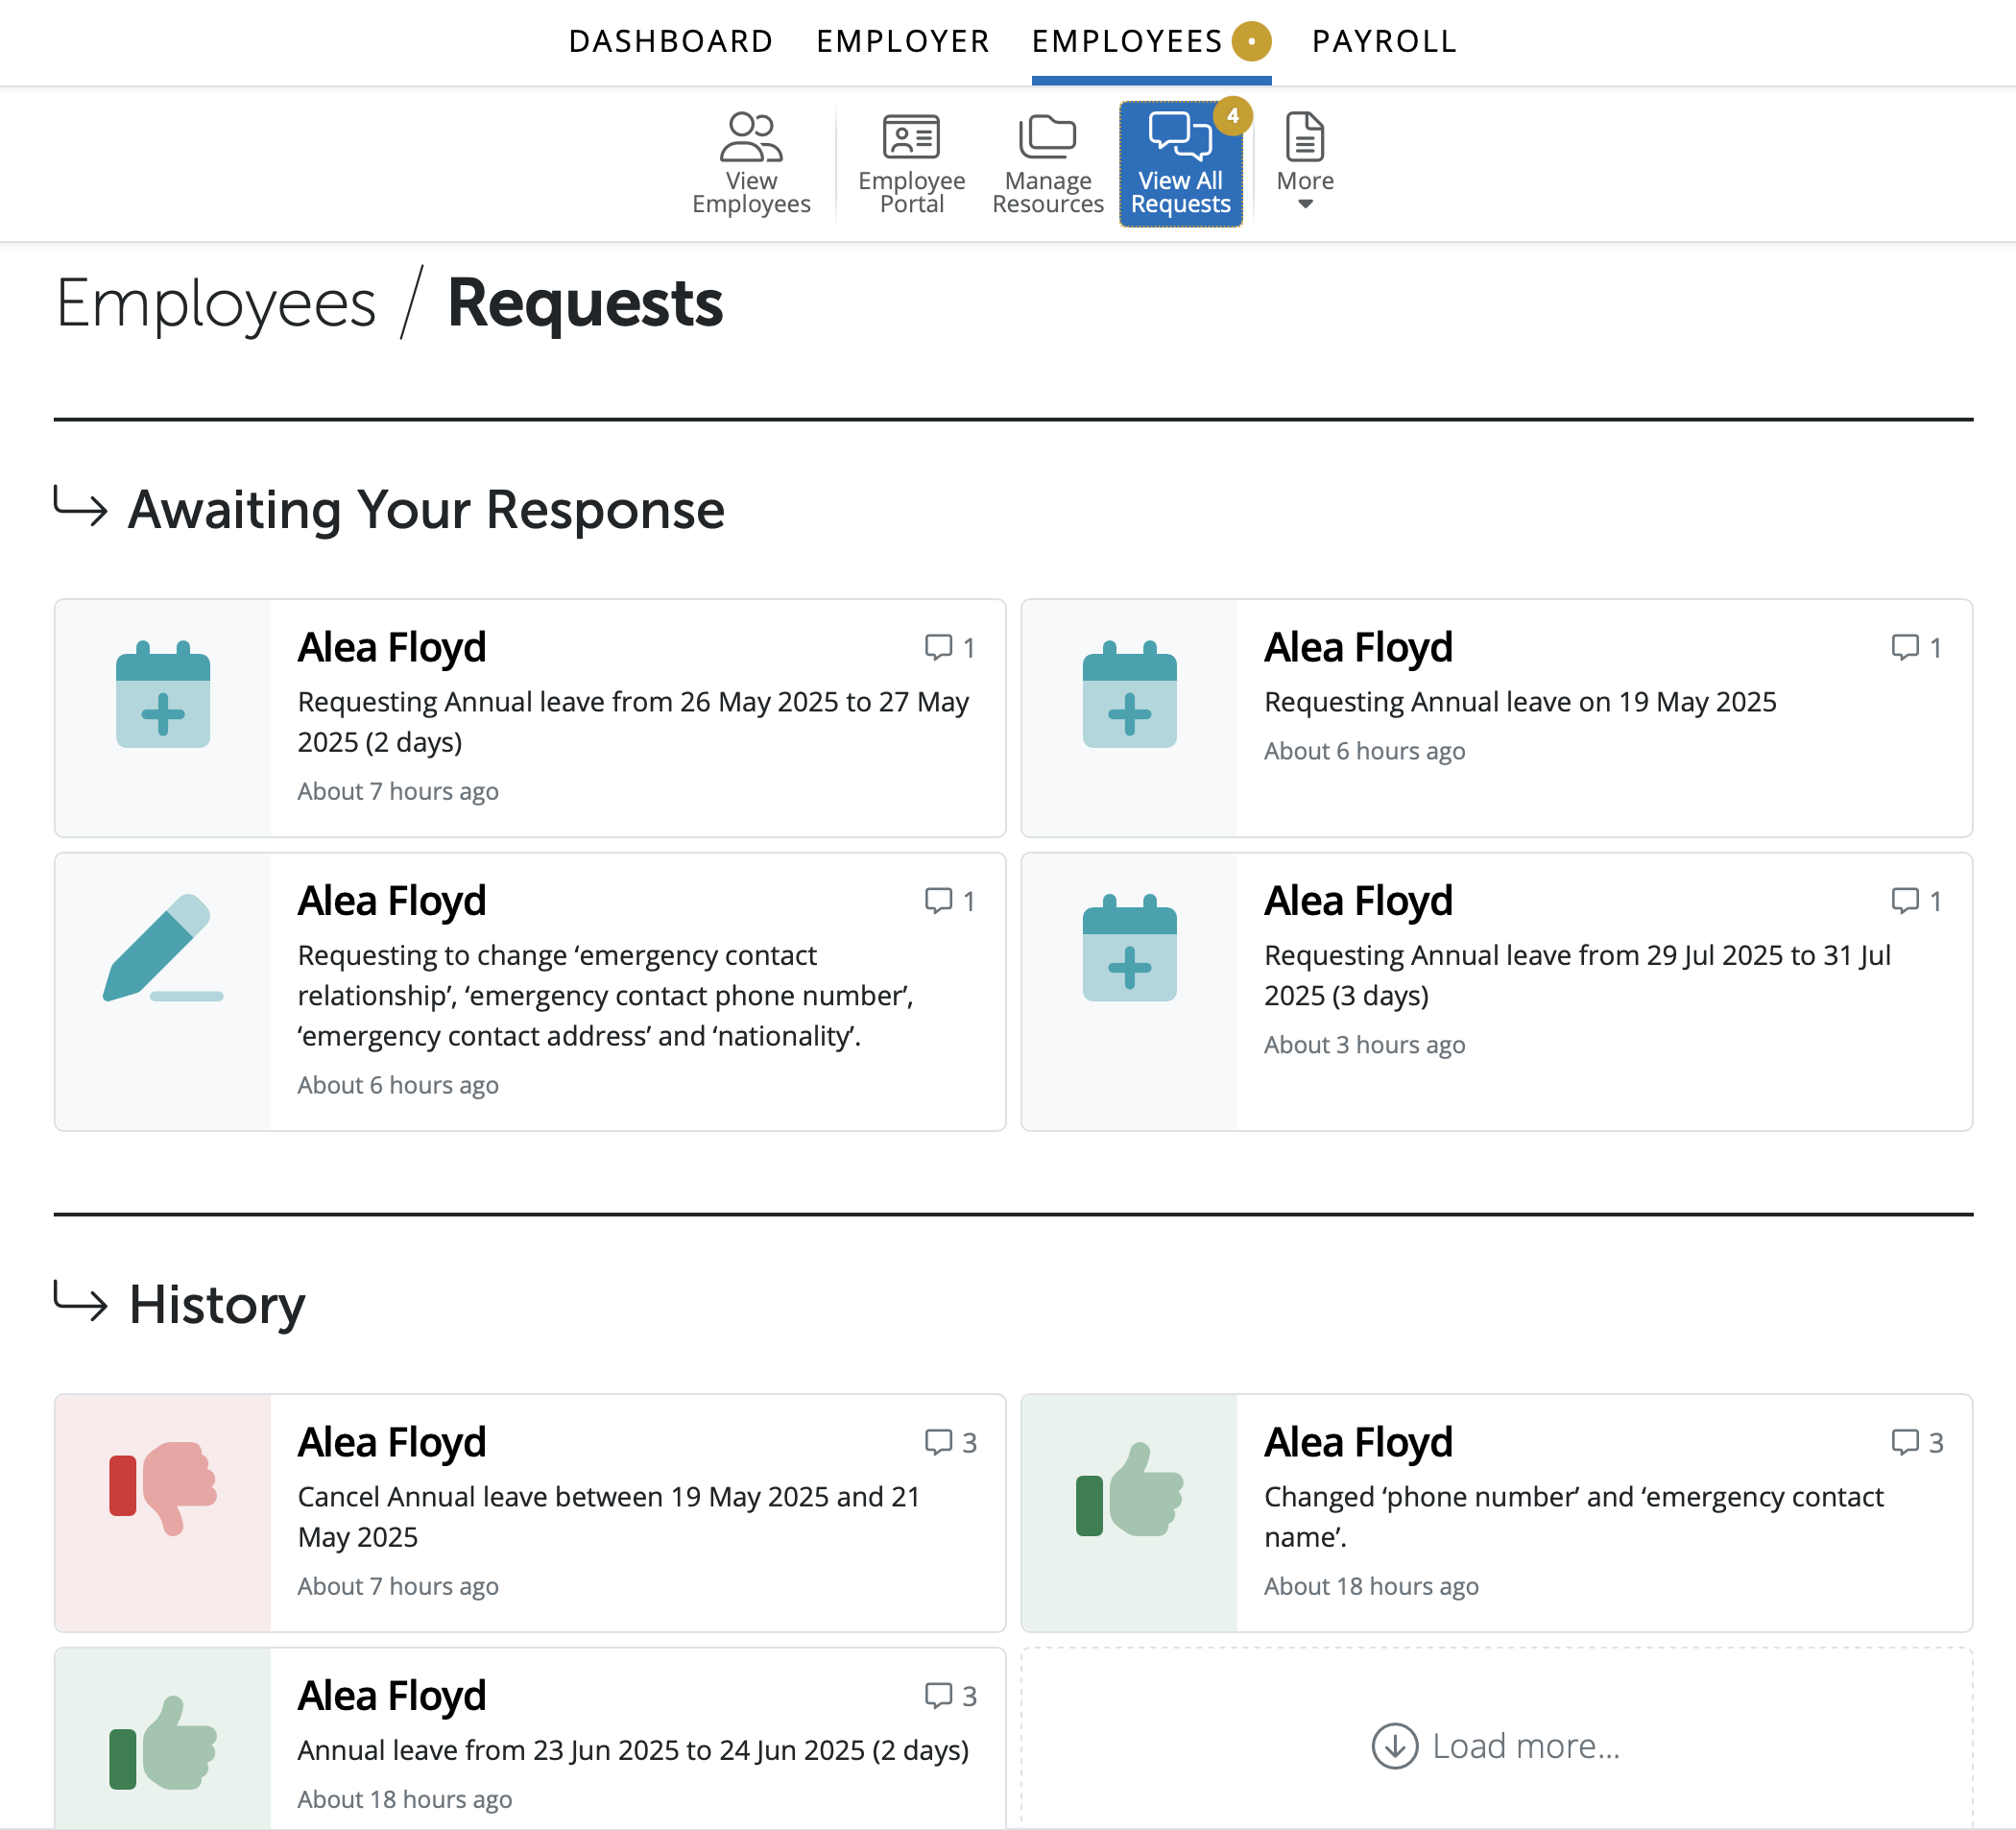
2) To view active and historic employee requests go to > Employees > View all Requests. The orange symbol will show beside the Employees heading if there are any outstanding employee requests. You will see the most recent employees' requests under the heading Awaiting Your Response. Click on a request to view the details.
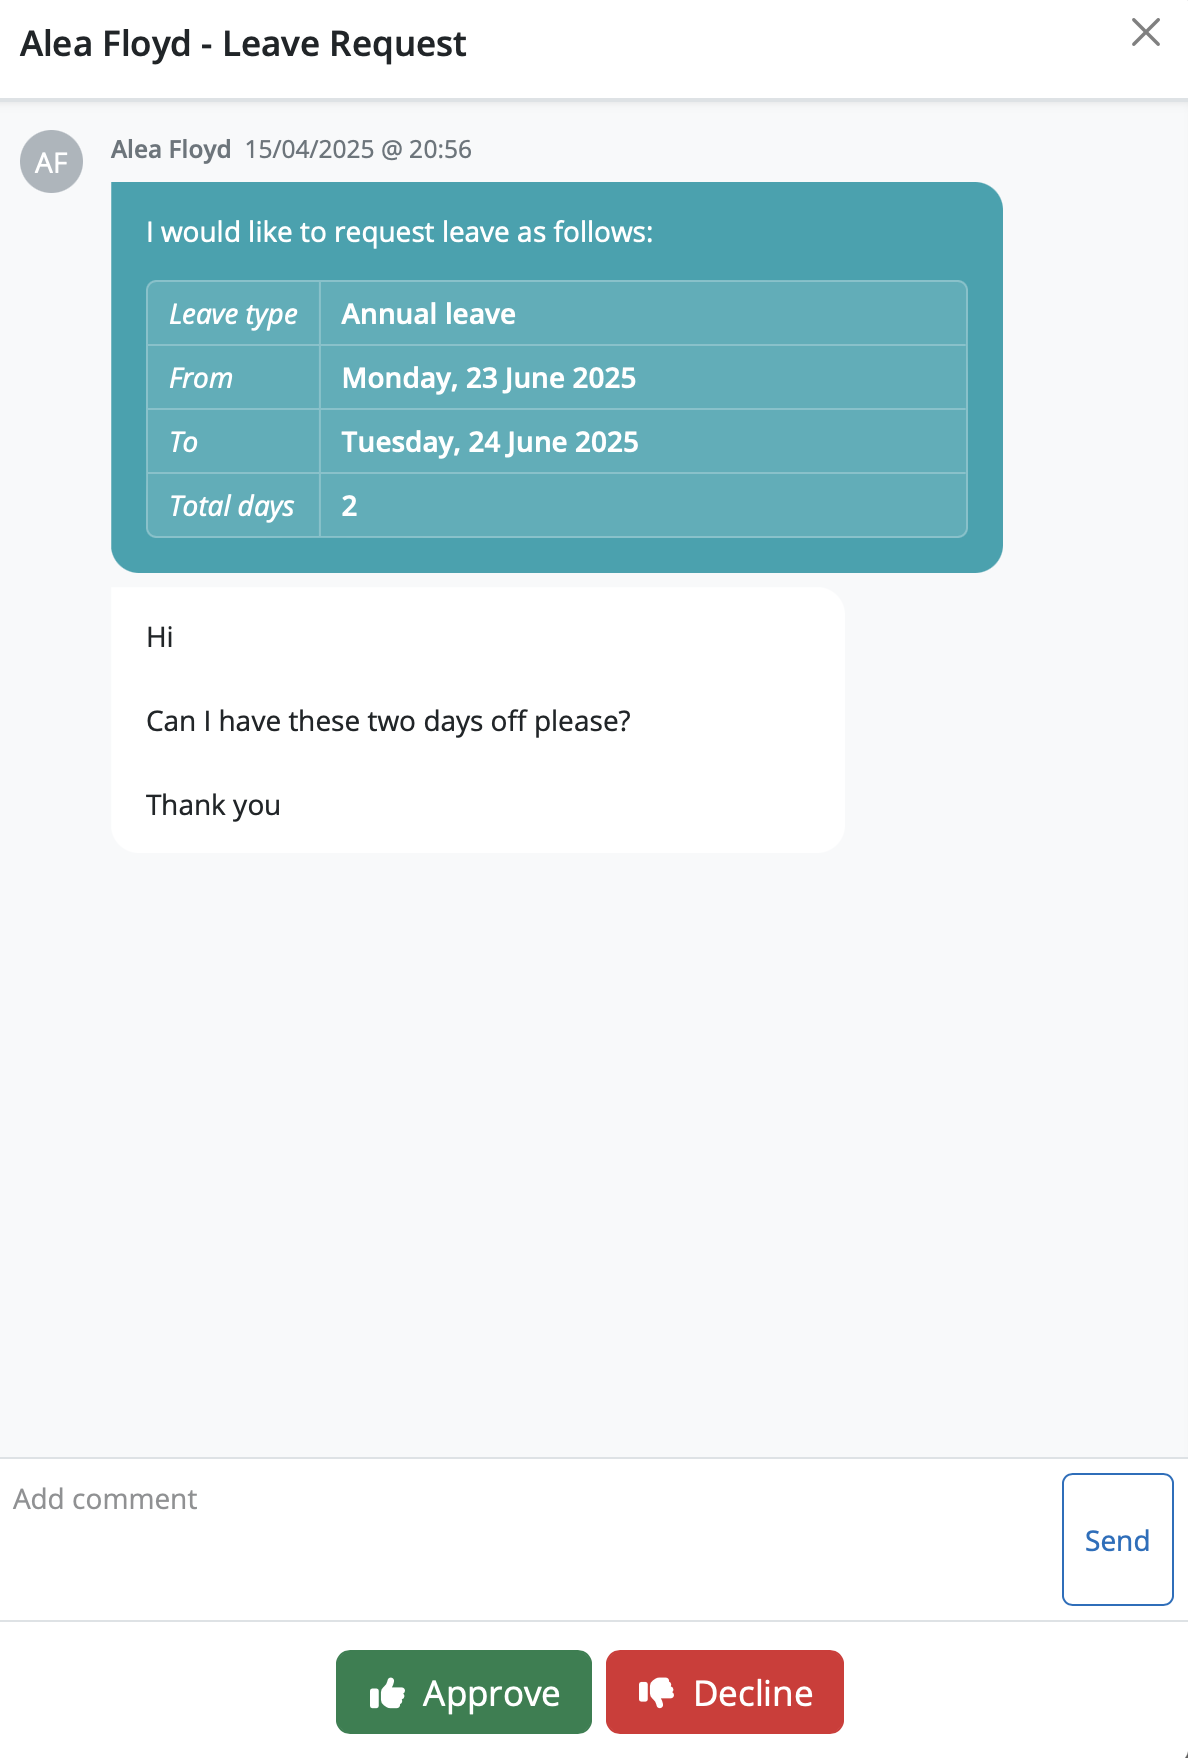
3) The details of the request and what type of leave, dates of leave or change of personal details and any comments added by the employee will be displayed. You have the option to Approve or Decline the employee's request.
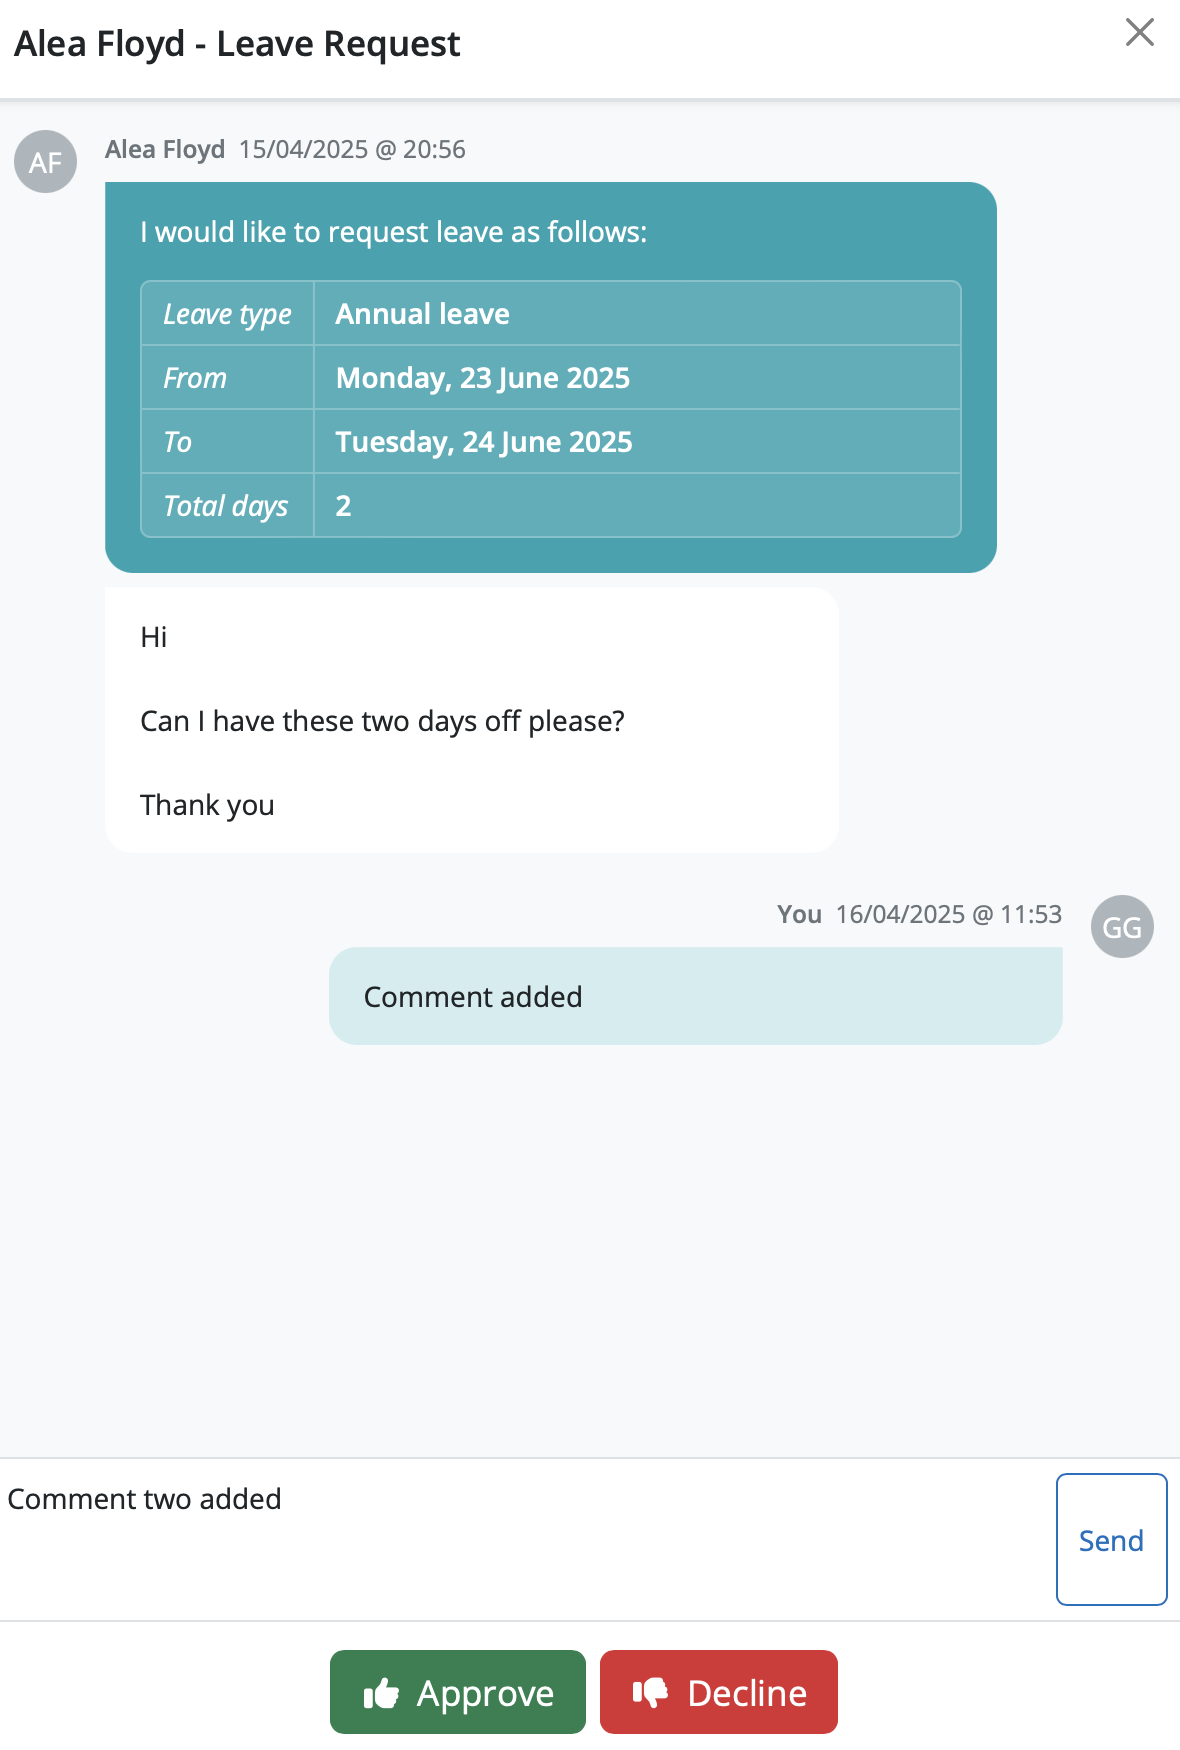
4) A Superuser or Standard user can add a comment to the active request if required. The employee will receive an email notification of the comment that was added. The comment will be added to the request so both employee and manager/employer can see it.
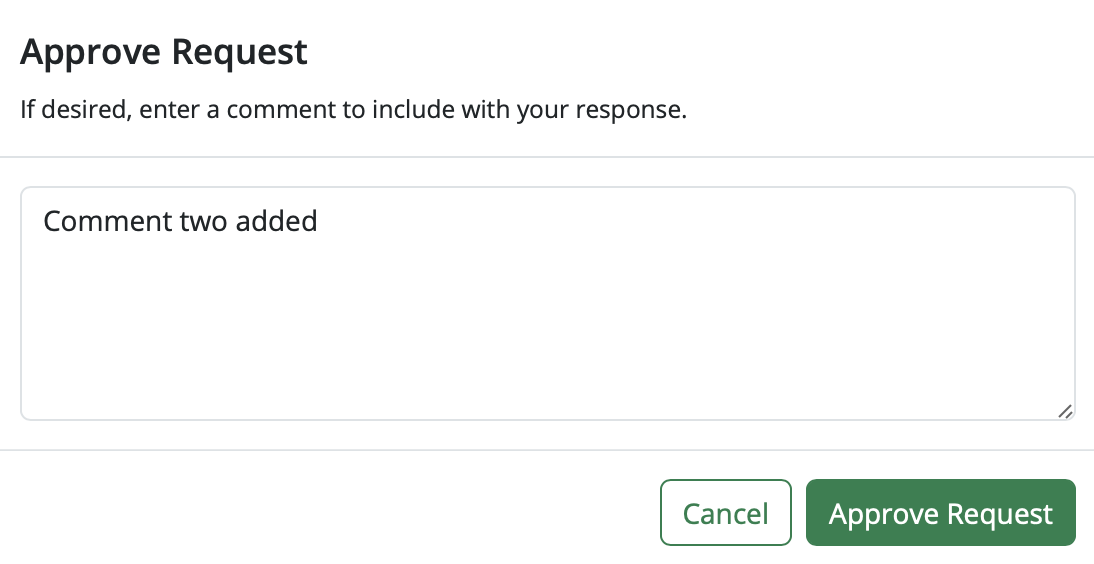
5) If you wish to approve or decline the request you can select 'Approve' or 'Decline'. A comment can be added to be included in the response for the request if approved or declined.
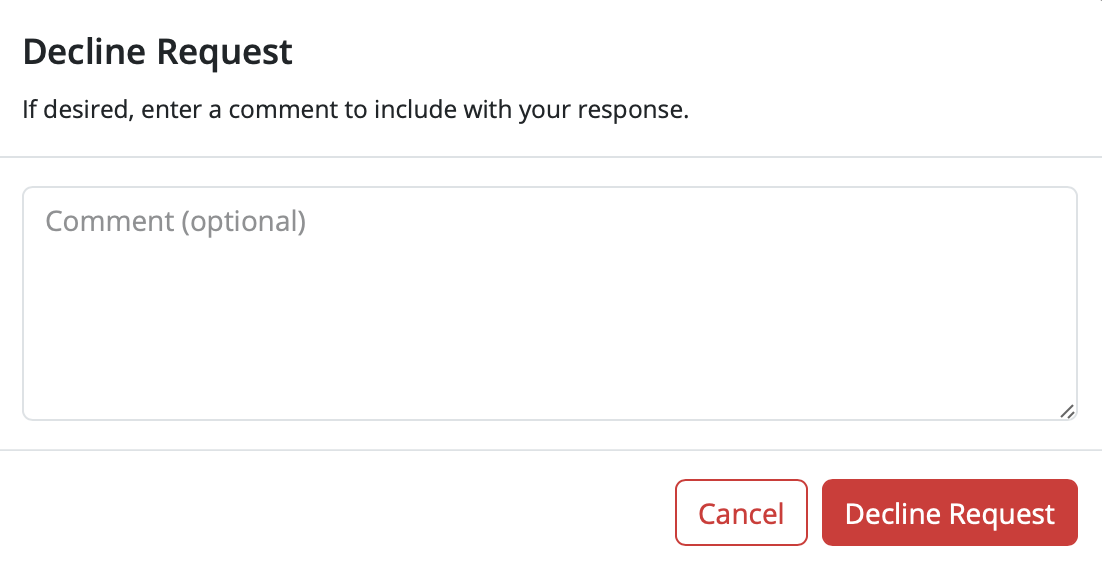
6) When the employee's request is approved or declined you will see the status of the request update. If the leave or change of personal details request is approved, the employee will receive email notification confirming this. The employer-wide calendar and employee's personal details will be updated accordingly to show the approval, as will the employee's calendar and record in their self service portal. Should the leave or change of personal details request be rejected, the employee will receive email notification confirming this.
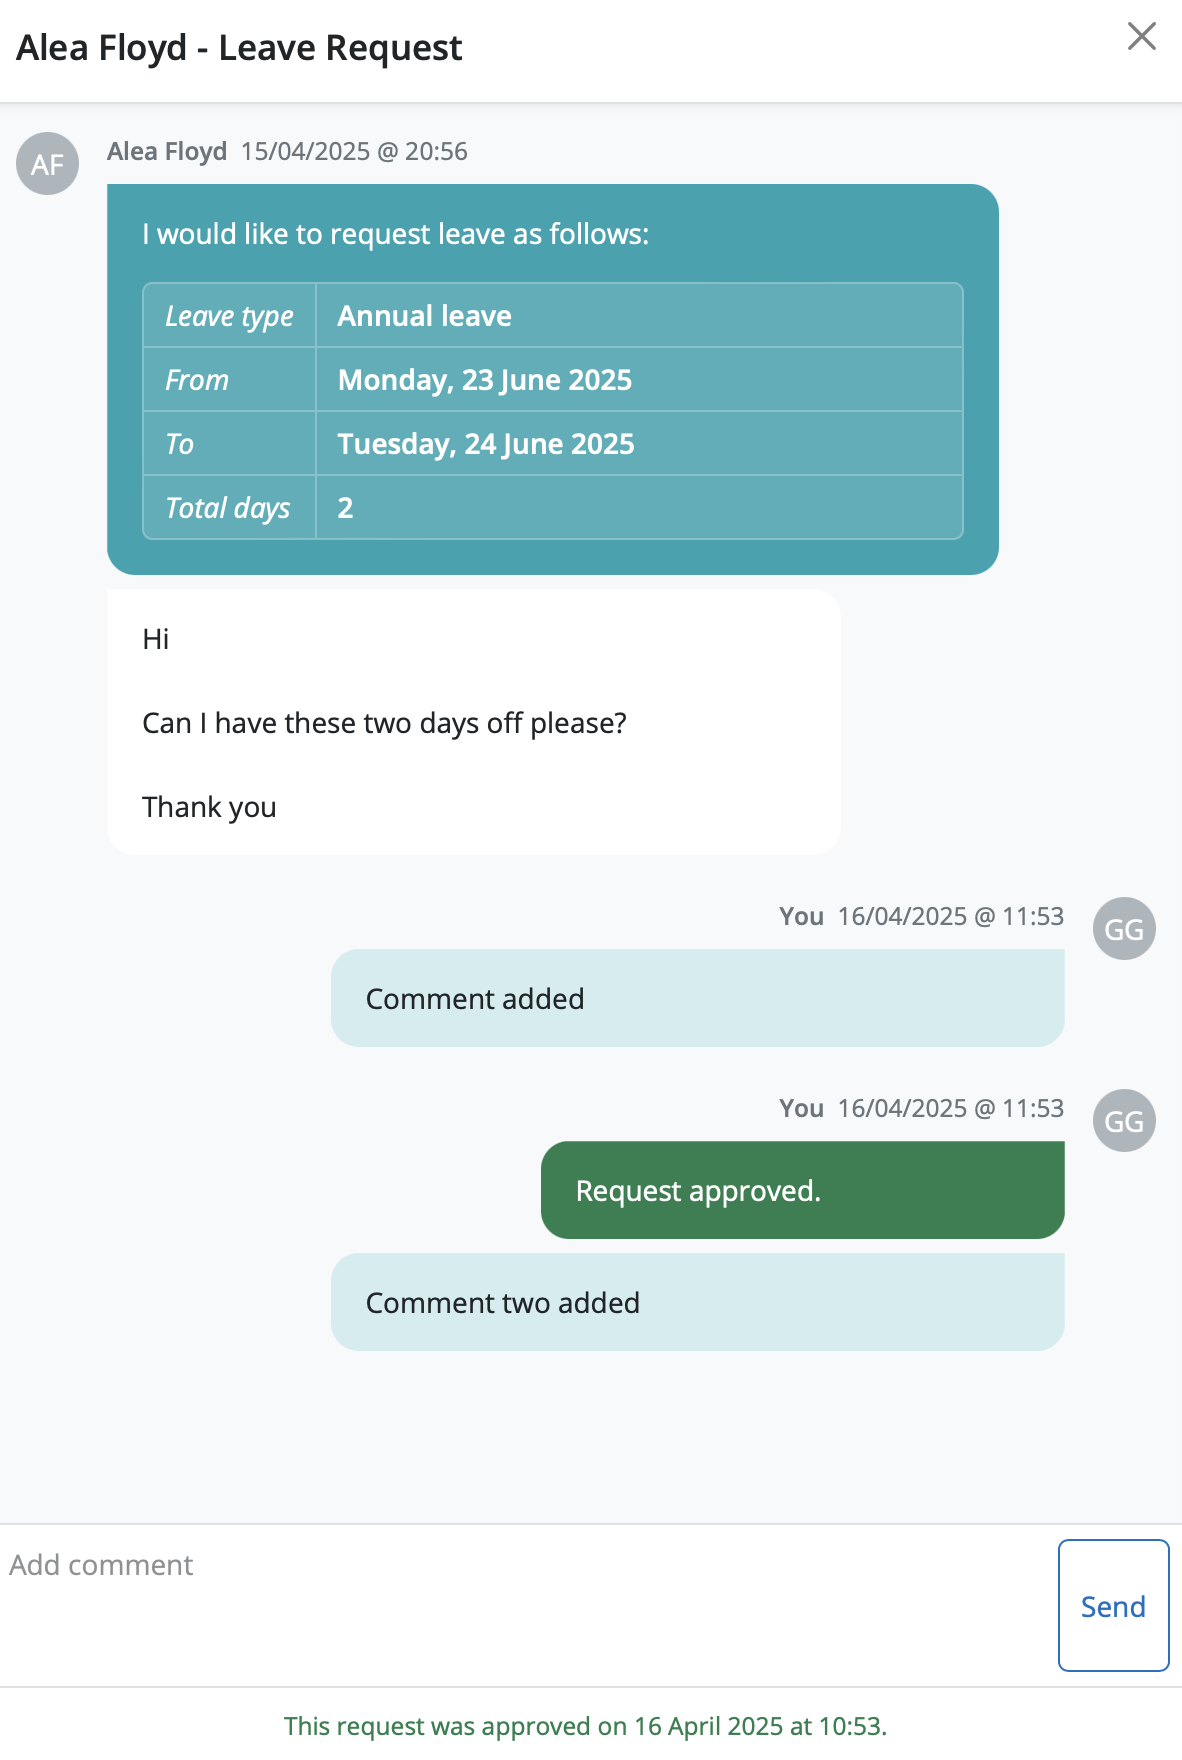
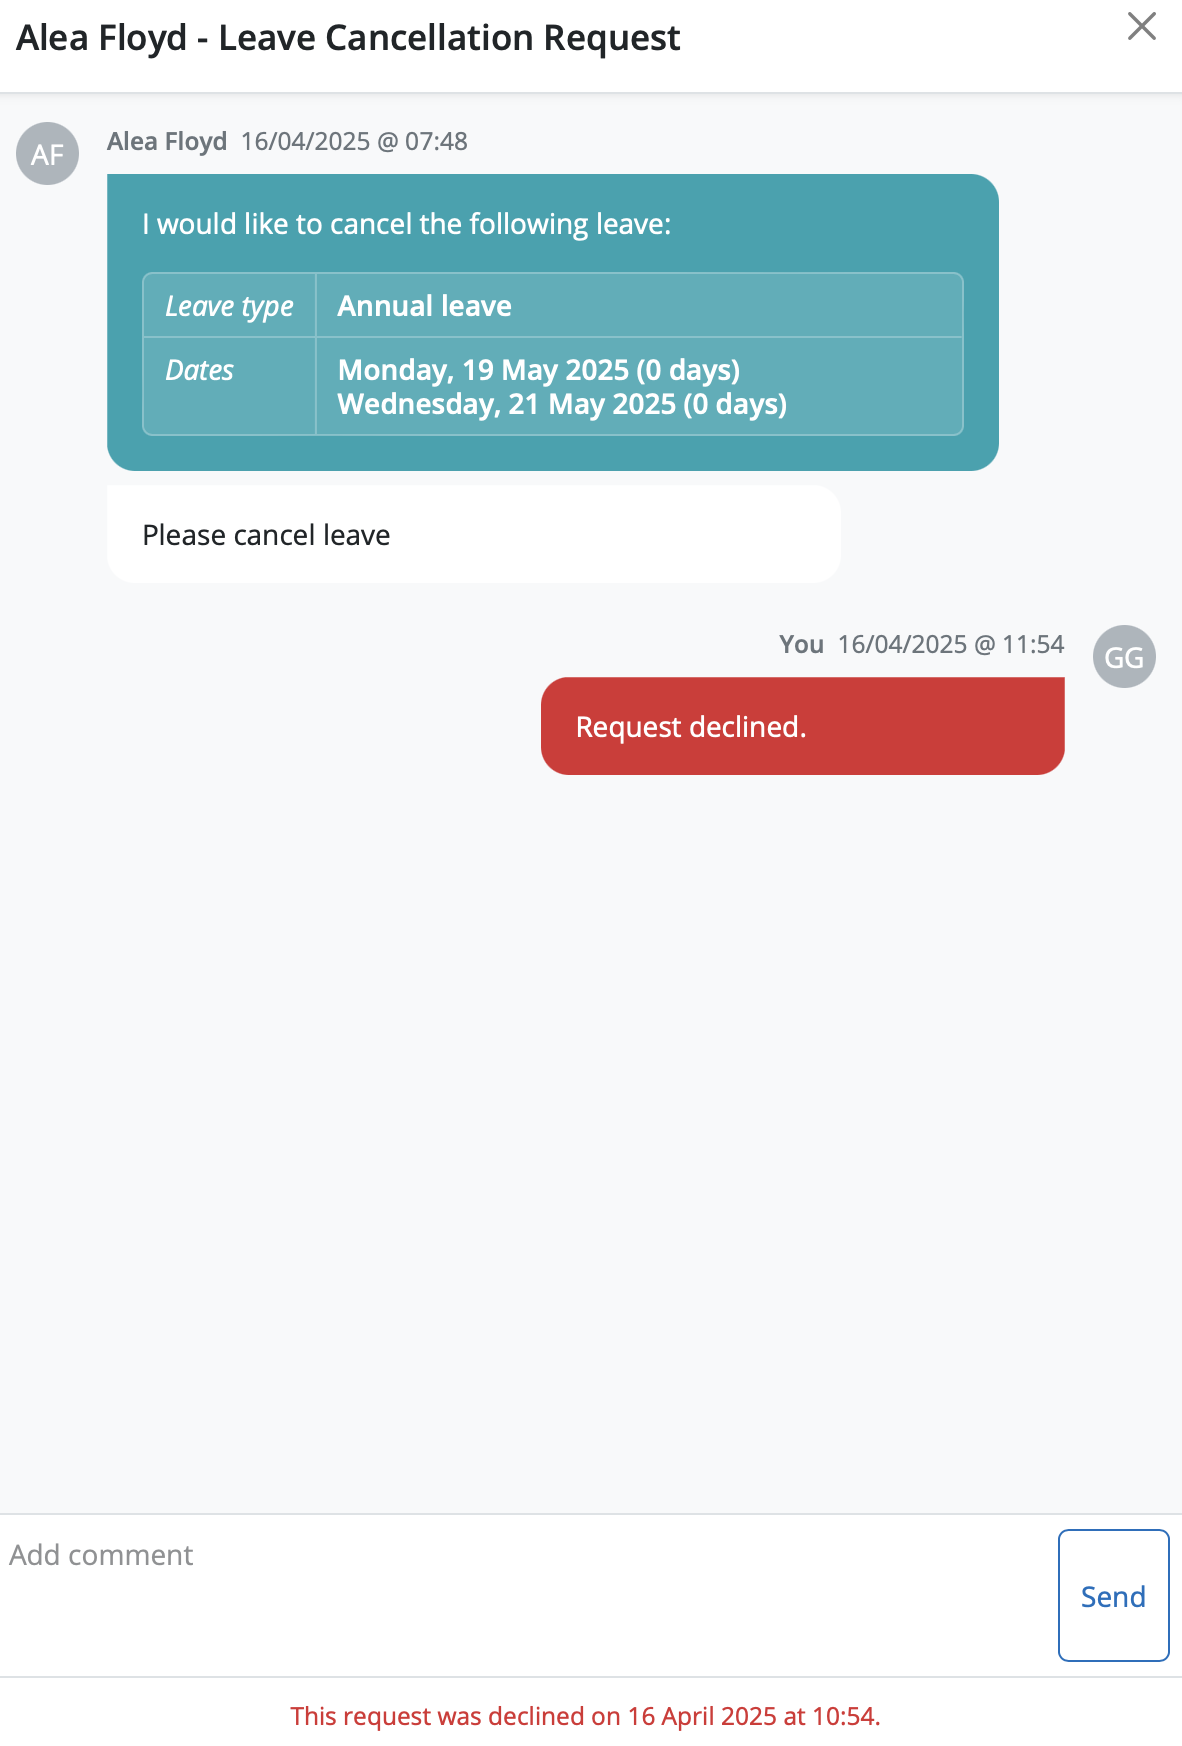
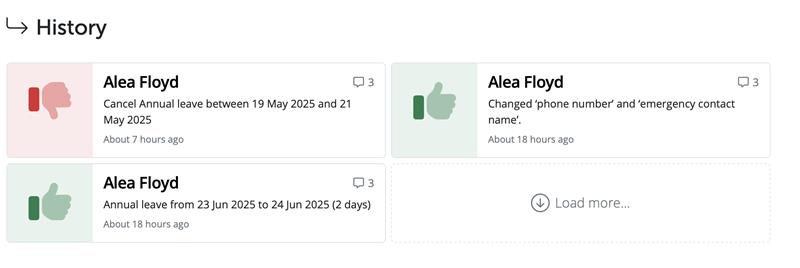
7) You can see approved or declined employee requests under the History heading in the Requests section and access these requests anytime by selecting the individual requests. Declined requests are identified by the red downwards thumb symbol and approved requests are identified by the green upwards thumb symbol.
If the employee is not seeing the option to request leave, check that the calendar feature has been enabled. The calendar function can be enabled under Employer section > Employee Portal > 'Enable Calendar'
A manager needs to be set up in order to approve / decline leave requests. Managers can be added as 'Global Manager' - approve everyone on the payroll; 'Department Manager' - approve leave for specific department(s); or 'Individual Manager' - approve leave for certain employee(s) only.
To add a Global Manager - Employer section > Employee Portal > 'Add global manager'
To add a Department Manager - Employer section > Departments > Select Department from listing (or create a new one if required) > 'Add department manager'
To add an Individual Manager - Employees section > Select the employee > HR tab > Under Reporting > Add manager
Whilst a client user can add and approve employee leave, they will not receive an email notification. If an email notification is required, you can also set them up as a global manager under Employer > Employee Portal section.
Comments
0 comments
Article is closed for comments.